Creation of payroll reports, including the Bank File necessary for bank transactions, is a crucial part of the thorough payroll procedure. It’s important to be aware of the specific format your bank requires for payment files, such as CSV, XML, Excel, or Text files.
The AanyaHR system is adept at generating the necessary bank file formats with precision. The bank files that can be created within AanyaHR include those for Security Bank (SBC), BPI/BPI Family Bank, Banco De Oro (BDO), EastWest Bank, and GCash.
Discover the process for generating a Bank File in AanyaHR. Below are the steps for your guidance.
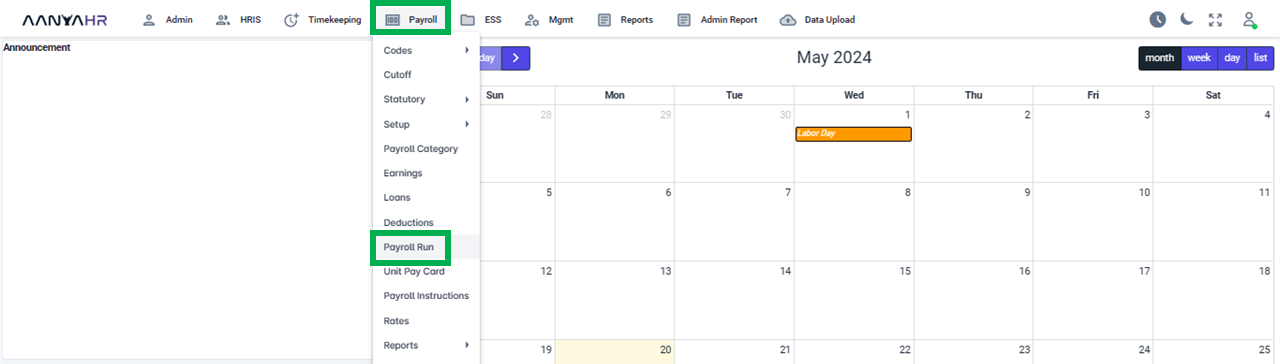
Go to Payroll and select Payroll Run
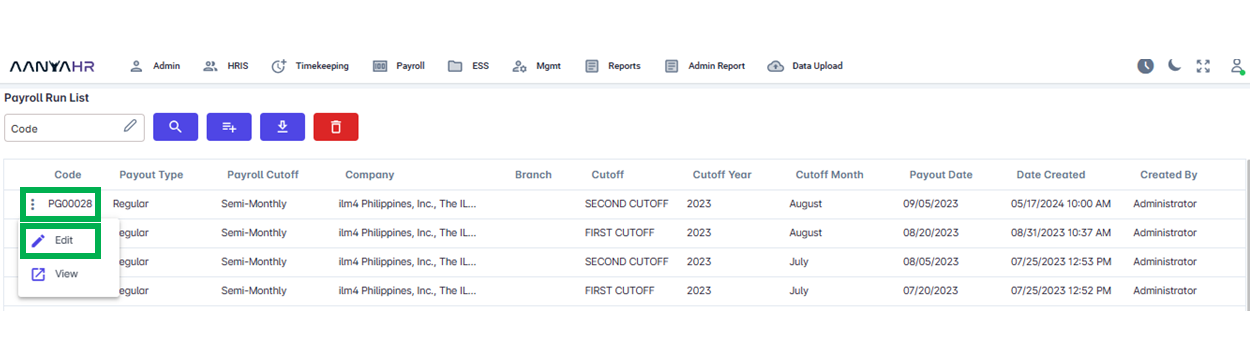
Once the specific Payroll Run is selected, click the ellipsis icon (3 vertical dots) and select Edit.
Navigate to the Generate Payroll.
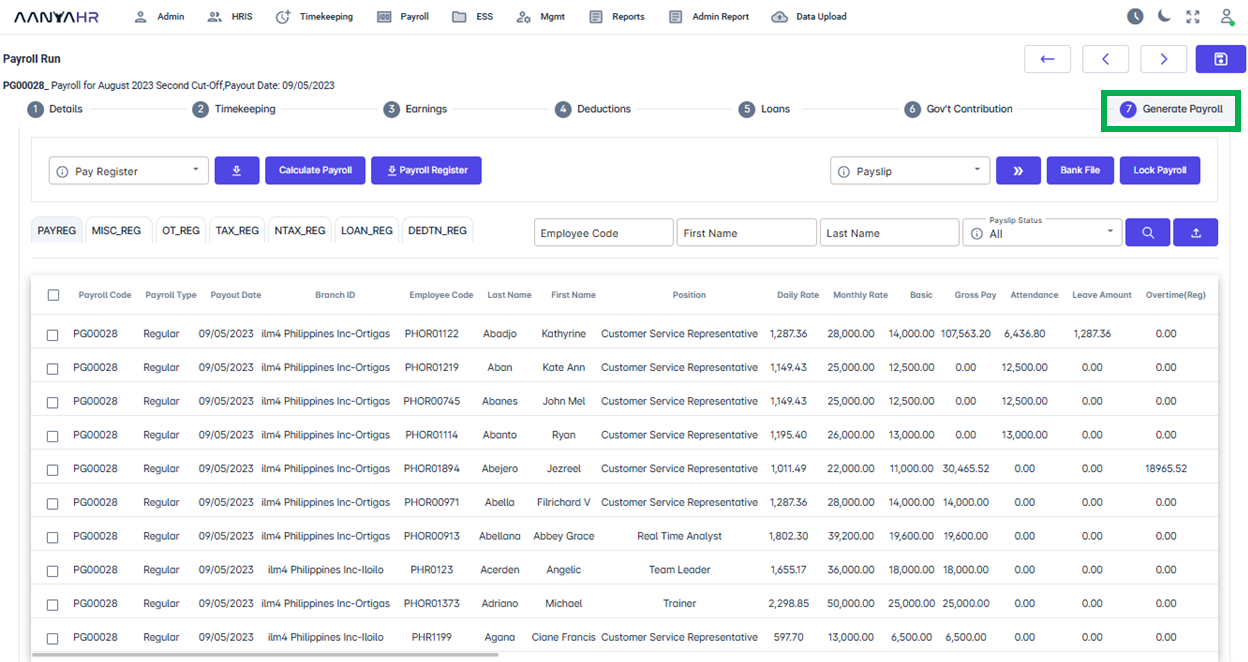
Click on the Bank File button.

Complete the required information; you have the option to choose from the provided list in the dropdown menu.
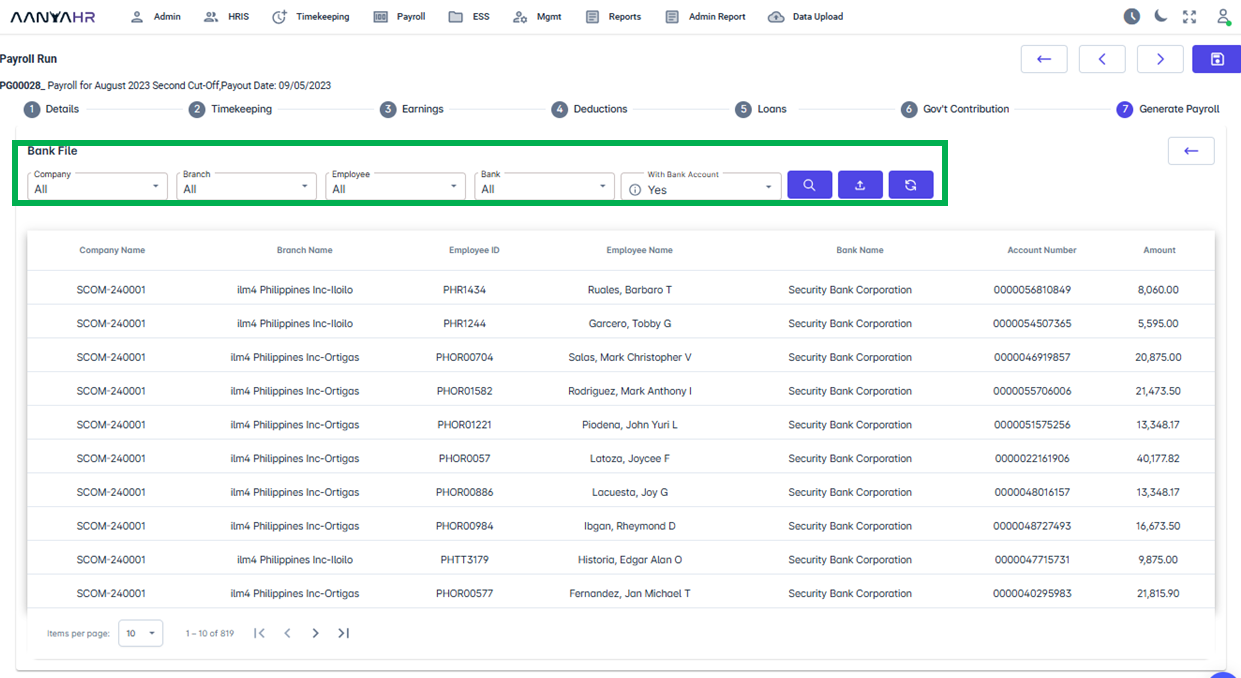
For guidance to complete the details mentioned above, you can refer to the meaning or functions associated with tagging.
Company - Specifically the company name that you are processing.
Branch - You can choose a particular branch from the dropdown menu or select the option for All Branches.
Employee - You have the option to choose specific employee(s) from the dropdown, or you can opt to select all employees.
Bank - You have the option to choose Specific Bank from the dropdown, or you can opt to select All Bank.
With Bank Account - you may select Yes if you wish to generate the bank file for those with bank accounts only or No if you opt to choose only the employees without bank accounts. All if you opt to generate Both.
Search Icon - represents a search/find function.
Export Icon - the action of exporting/downloading data.
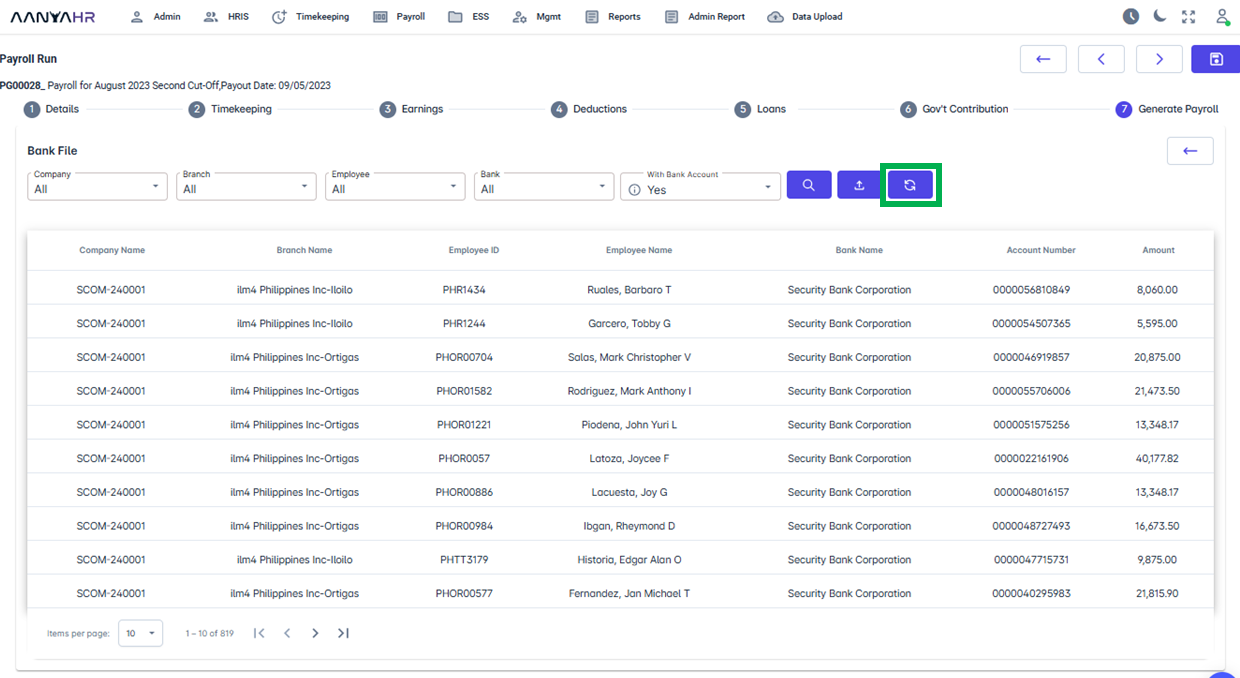
Generate Icon - This is where you can input the details for the bank file creation.
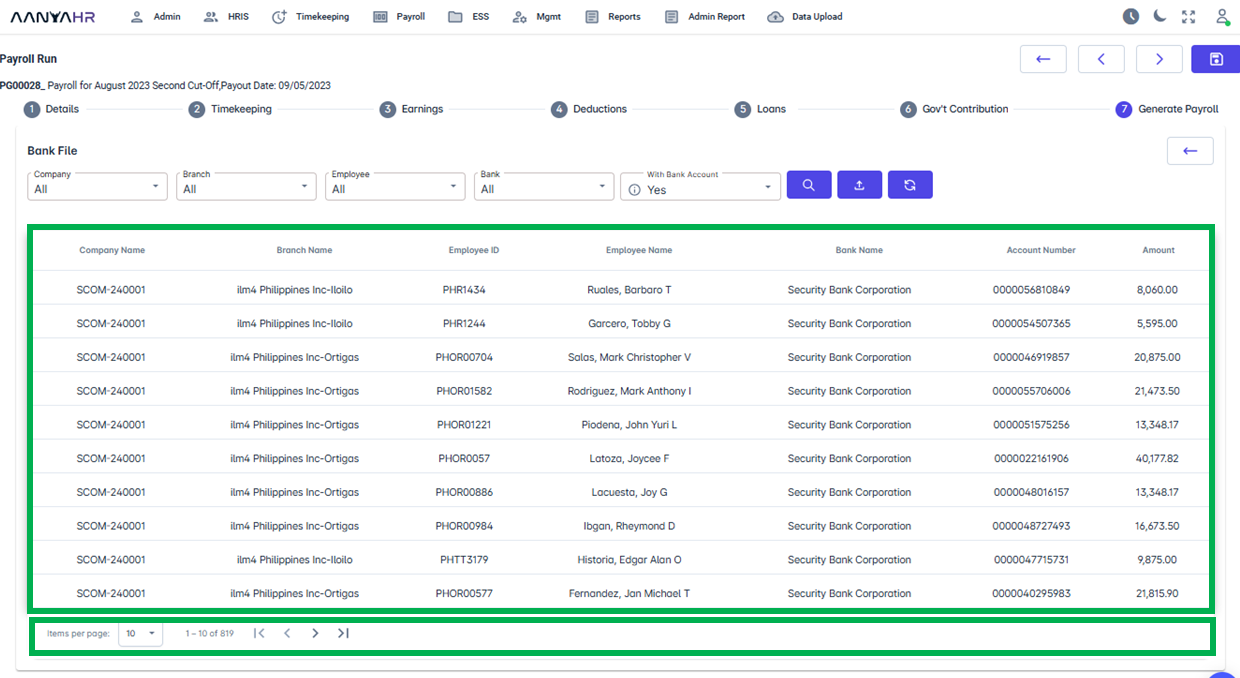
Bank File Details View - here are the particulars of the bank details as shown in the preview.
Entries per page - this indicates the number of items displayed on a single page.
Page Display - you have the option to select the quantity of pages displayed using the dropdown selection.
Page identifier - identifies the page within a document or a set of pages currently displayed.
Next Page Icon - should you desire to proceed to the subsequent page of the display, you may do so by clicking this icon.
Last Page Icon - should you desire to proceed to the last page, you may do so by clicking this icon.
After filling in all the necessary details, you can press the Generate icon to initiate the creation of the bank file.
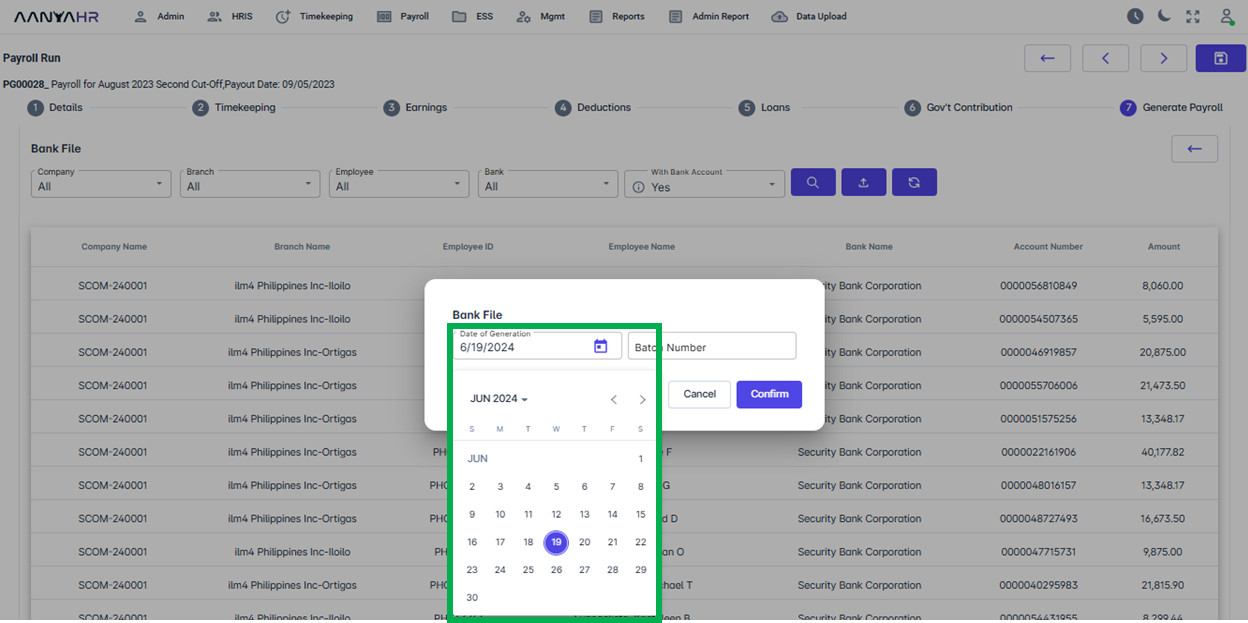
Once you have clicked the Generate icon a Bank file box details will show. Simply enter the required information for the Date of Generation, or you may retain the details as they were originally displayed at the time of generation.
For the Batch number, you may select any number you prefer, as long as it does not exceed 15 numerical digits. You have the option also to either type in a number directly or use the up/down arrows provided for selection. After entering the details, click on Confirm to continue.
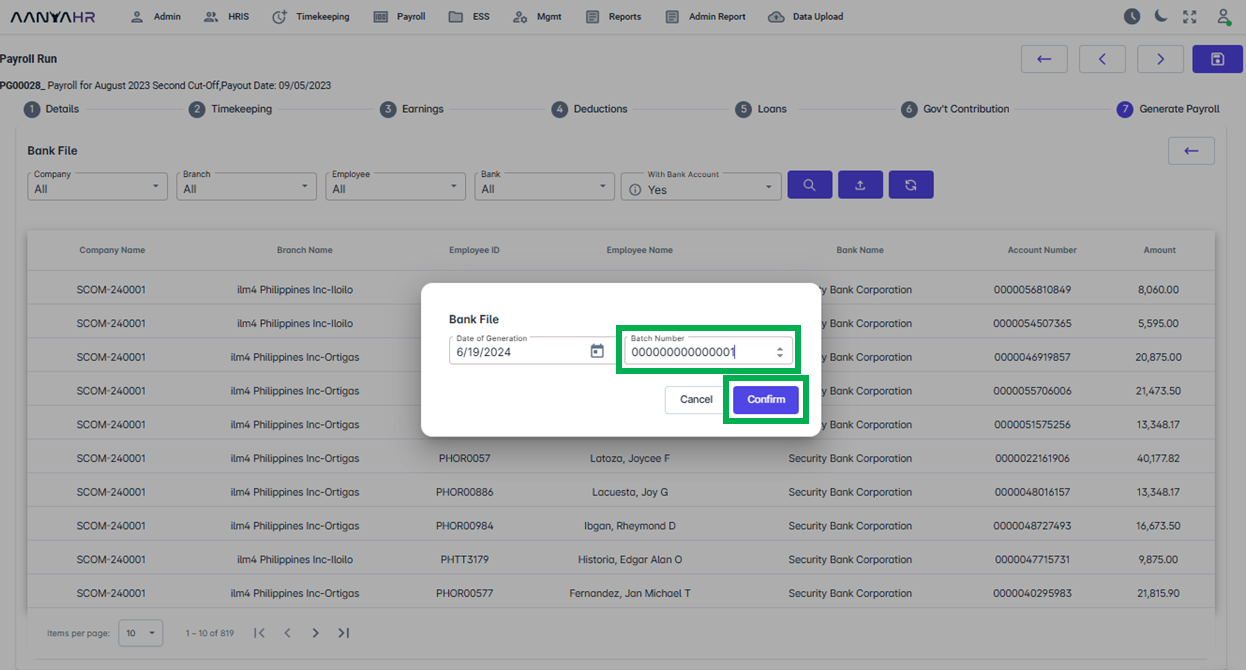
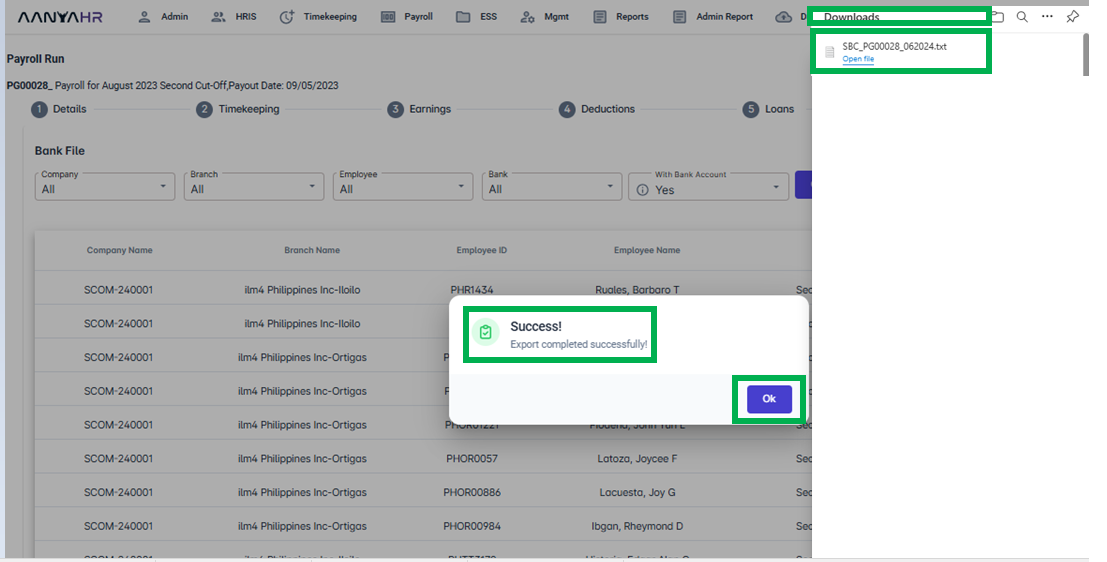
Upon clicking the confirm button, a text file will be generated and automatically saved to your downloads folder. You will receive also a notification confirming the successful export of the bank file. Please click OK to continue.
Go back to:
