For the instructions in Manually Adding the Earnings in the Payroll run, please refer to the following procedures.
Click Payroll and select Payroll Run

Once the specific Payroll Run is selected, click the ellipsis icon (3 vertical dots) and select Edit

Navigate to the Earnings module and choose a specific option from the dropdown menu within the Transaction section.

Under the Transaction button, you can find the Edit and Add options.
If you wish to manually modify a specific previously uploaded earnings entry, you can select Edit.
If you wish to upload a new earning for this specific pay run, select the Add option.

Select the Add option from the transaction type dropdown.

To Add Earnings in the payroll run, you may choose from the two options.

You can add earnings to the payroll run using two options that are available under the Earnings Type dropdown
Manual - refers to manually inputting earnings into the system.
Upload - refers to entering earnings into the system using a template.
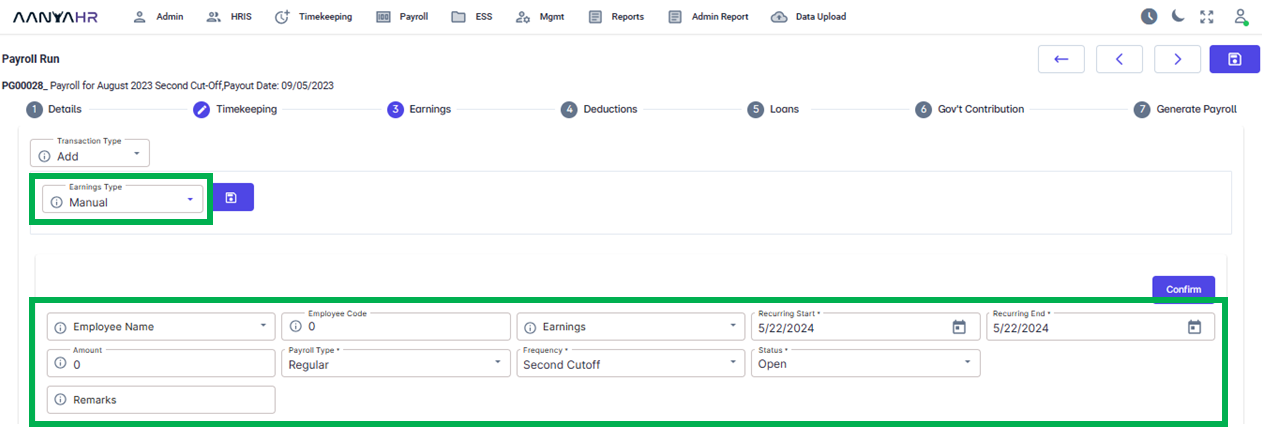
To Add Earnings manually, select Manual in the Earnings Type dropdown

After selecting the Manual option, you can complete the necessary details displayed in the lower section.

For guidance to complete the details mentioned above, you can refer to the meaning or functions associated with tagging.
Employee Name - select from the dropdown the employee with Earnings to be included in the payroll processing
Employee Code - This field will be automatically populated once you select the employee’s name.
Earnings - Include specific earnings pay code in the payroll for the selected employee.
Recurring start - Enter the date corresponding to the start of the processing cutoff or any dates within the payroll processing period.
Recurring end - Enter the date corresponding to the end of the processing cutoff or any dates within the payroll processing period.
Amount - Specify a particular earnings amount.
Pay-out Type - Choose from the options listed below
Regular
Final
Special
Maternity
13th Month
Frequency - you may select from the list below
Every Cut-Off
First Cutoff
Second Cutoff
Week 1
Week 2
Week 3
Week 4
Week 5
Status - It can be either
Open
Close
Pause
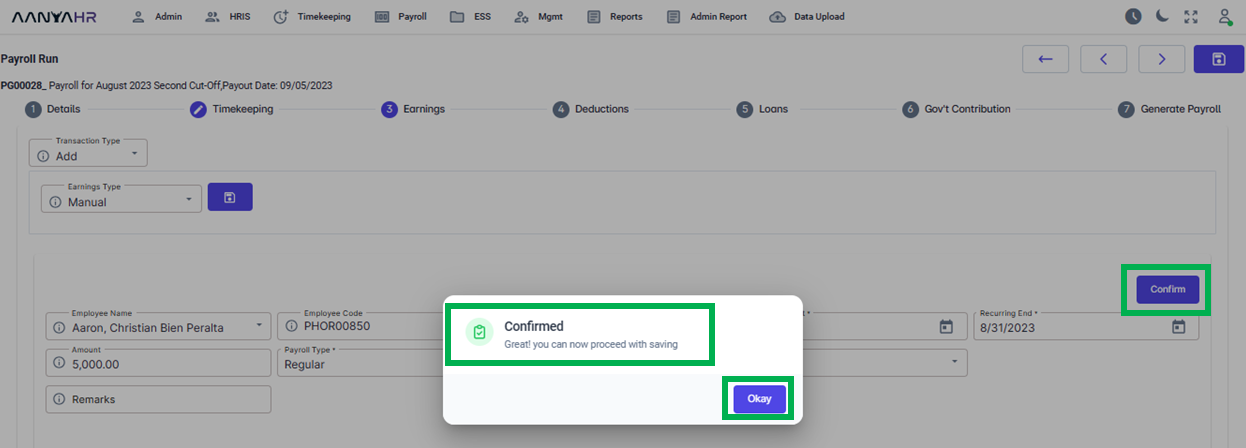
Once you’ve completed the necessary details, click Confirm. A notification will then prompt you to proceed with saving, click Okay.

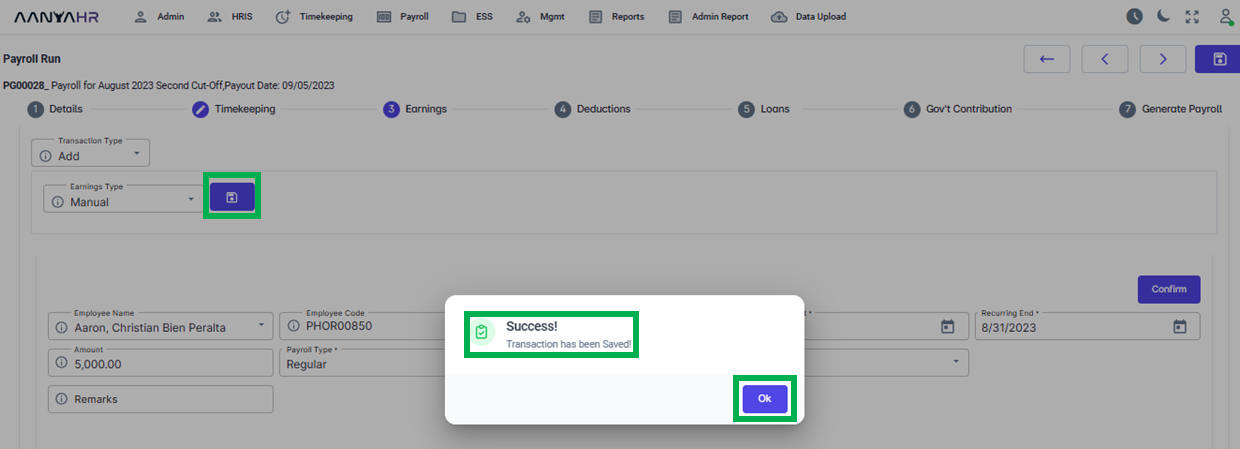
Click the Save button. A notification will then prompt you that the manually created earnings have been saved successfully. Click Ok.

Go back to:
How to Add Transaction in the Earnings Module in Payroll Run?