Learn how to structure your data correctly, input the required fields, and generate a file that meets BPI’s specifications for smooth financial transactions. This guide simplifies the process of creating accurate and compliant bank files.
Go to AanyaHR and Login to your account.
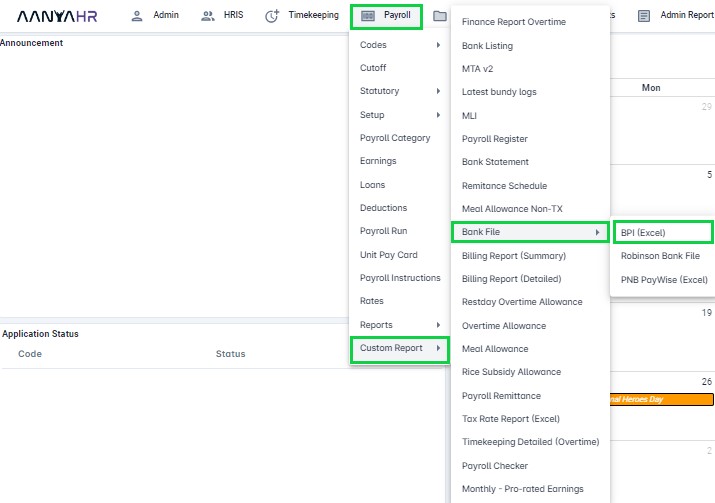
From the Payroll menu, navigate to the Custom Report section, then click on "Bank File" and select "BPI (Excel)".
Select a value from the dropdown list provided.

Month: Choose the month for which the bank file is applicable.
Cutoff: Select the cutoff period relevant to the bank file.
Year: Choose the year in which the payroll was processed for the bank file corresponding to the selected month.
Payout Type: Choose the appropriate payout type required for the bank file you want to generate.
Click "View Report" to display the selected report.

Click the “downward arrow” in the box to choose the file format for export.

Select "Excel" to export the file in Excel format.

A file will be created and saved automatically to your Downloads folder. You can then open the file to review its contents.

